Rules
Create a new rule
To create a new rule, change to tab “Rules” and click the link “Create new rule”. You will get to the form for creating a new rule.

In the following all form fields will be explained.
The form fields
Name and post type
A rule always requires a Rule name. This name will only be used for internal purposes of administration. The name will appear in the list table of all rules.

You can decide if the rule should refer to all Post types or just to a special one. Choose “all types” or select an individual type. The plugin supports all custom post type of your blog.
Category filter
If you select a post type which has categories, you will see the category filter boxes, like in this example for post type “Job Listings” which comes with the plugin “WP Job Manager”.

Note
Select no category if you want all categories (including future categories) to be considered.
If you want to send notification emails only if the post has one or more certain categories attached, select those categories in the “Include categories” box on the left. To select multiple categories hold down the control button (ctrl) on Windows or command button (cmd) on a Mac.
If you want to send notification emails for all categories except one or few categories, select those to exclude in the “Exclude categories” box on the right. Remember that the exclude filter is dominant. This means if you select a category in both the include and exclude box, it will be excluded.
Note
The “Exclude categories” filter is dominant!
If you do not select any category, the category filter will have no effect. Notications will be sent no matter which categories the post has attached.
Post status
The main focus of a rule is on Status before and Status after.
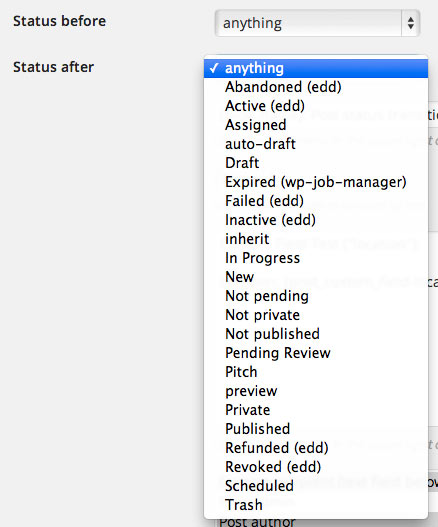
With these two settings you decide on which status transition a rule will match and the notification process be executed. If for example an email should be sent on publication of a post, select “Not published” for Status before and “Published” for Status after.
“Not published” is a special status PSN provides to match all statuses but “Published”. The same applies to “Not pending” which matches all statuses but “Pending” and “Not private” which will match all statuses but “Private”.
Another special status is “anything”. It applies to every status. If you set both fields to “anything”, the rule will match every status transition of a post. This combination may be good for monitoring every status transition of your content.
PSN also supports custom post statuses registered by plugins. They will be appended to the Status before / Status ater select list with the internal abbreviation of the plugin in brackets, like “Expired (job_manager)” in the screenshot above.
Subject and Text
The field Subject is for the subject text of your notification. You may fill in a maximum of 200 characters. All placeholders are supported (see Placeholders). Their purpose is to stand in for data that will be automatically inserted into the email notification. For a list of all placeholders, click the link “List of all placeholders” right to the form.
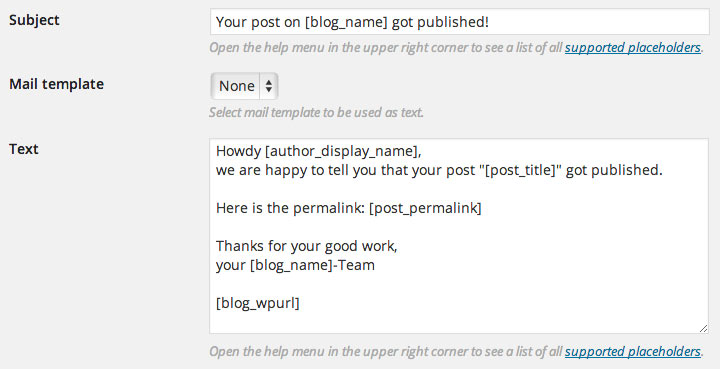
In the field Text you can write the text for the notification. Again all placeholders are supported.
If you want to use conditions in your notification texts, check the chapter Conditional templates.
Mail template
If you have prepared a mail template in the section “Mail templates” (see Mail templates) then you can select it in the “Mail template” drop down. The text of the selected mail template will be used for generating the email text. If you have configured the mail template to use HTML format, the notification email will be sent as HTML mail.

Attachment

With this field you can realize file attachments for e-mails. This requires the use of the free version of the plugin Advanced Custom Fields (ACF). The following explains how this works.
If it is not already present, you need to install the ACF plugin which is available for free in the WordPress plugin index: https://wordpress.org/plugins/advanced-custom-fields/.
ACF settings
Create a field group in ACF for the post type for which you want to support attachments in PSN. Select “File” as field type and “File-ID” as return type.
Note
“File-ID” is the only supported return type.
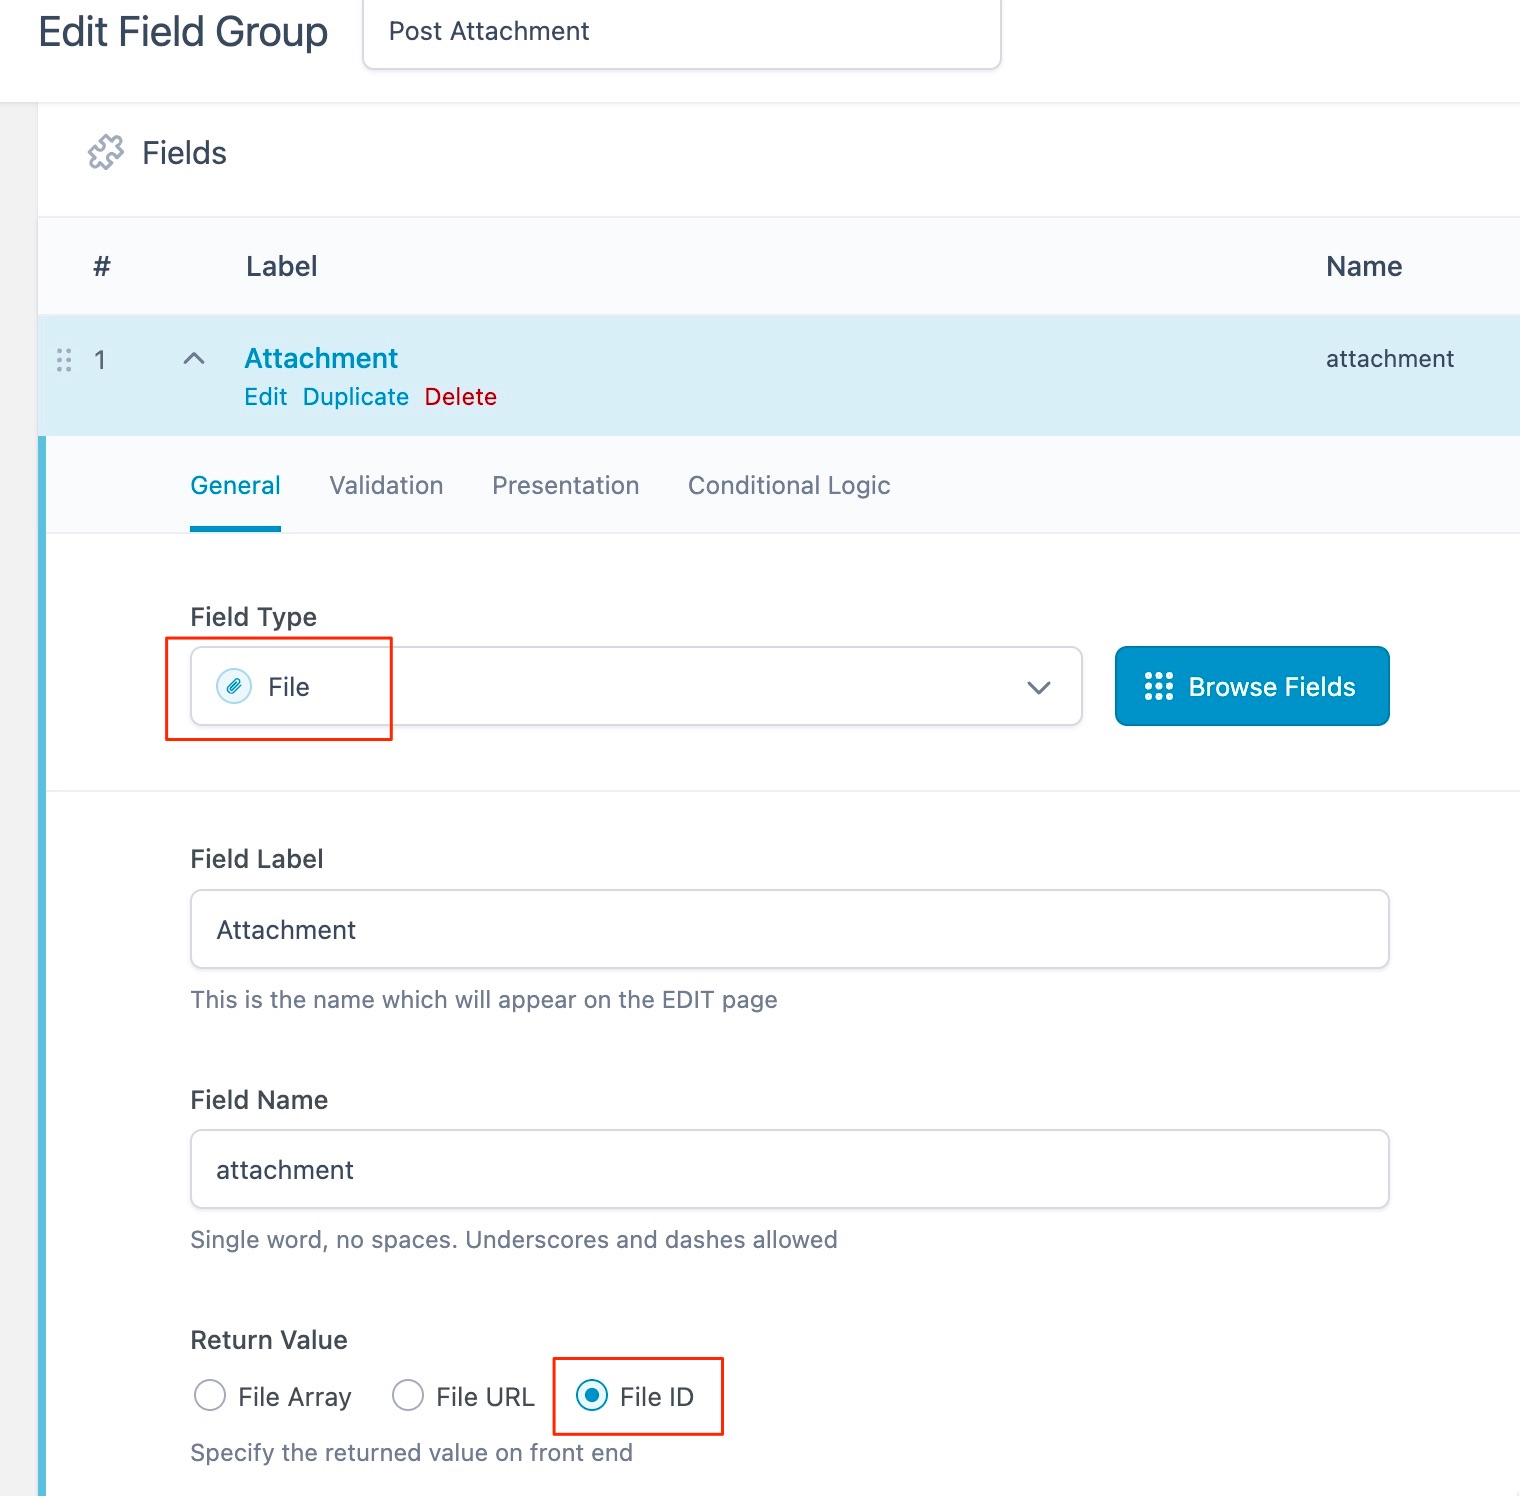
Field label and name are up to you. The name is important to match with the PSN placeholder. In this example we chose “attachment” as field name as shown on the screenshot.
PSN rule settings
In the PSN rule field “Attachment” you can now enter the placeholder which matches the ACF field. It is a combination of post_custom_field- and the ACF field name, in this case we chose attachment.
Note
Placeholder = [post_custom_field- + ACF field name]
So the placeholder in this example would be [post_custom_field-attachment].
If your ACF field has a different name, you need to adjust the placeholder accordingly.

Multiple attachments
It is also possible to add multiple attachment to your e-mail notification. Just create other ACF file fields as described above and add the according PSN placeholders in the rule attachment field separated by comma, like so:
[post_custom_field-attachment],[post_custom_field-attachment_2]
One email per TO recipient

If you do not want that a recipient can see the email addresses of the other recipients, this feature is your choice. If activated, Post Status Notifier will split the list of TO recipients and send one single email per TO recipient disregarding the CC and BCC settings. So in the final emails there will be only one TO recipient.
Note
If the “One email per TO recipient” feature is activated, CC and BCC settings will be ignored!
Use this feature with care! It may produce server load depending on the amount of recipients. If you run into a timeout, you can adjust the maximum execution time for this feature in the options (see TO loop timeout).
This feature is still in Beta status.
Recipient
For Recipient you can select who should get the notification. PSN supports multiple recipient options.
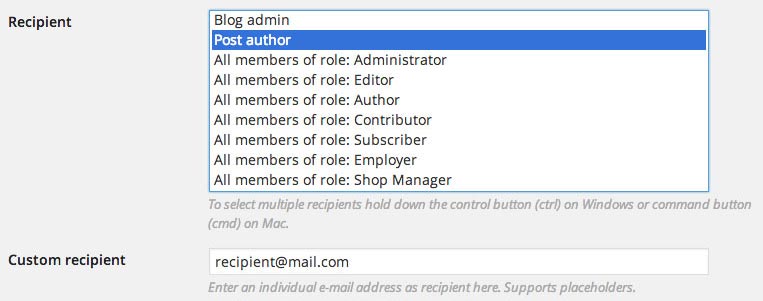
For “Blog admin” the email address of the general blog settings will be used. For “Post author” the post author’s email address will be used.
If you want to use a custom e-mail address, enter the recipient’s e-mail address in the text field “Custom recipient”. For multiple custom recipient addresses, separate them by comma. This even supports placeholders, so you could define the recipient of a notification by a custom field and use for example a placeholder [post_custom_field-notification-recipient] as individual e-mail.
If you want to send notifications to all members of a certain role, you may select this role’s entry like “All members of role: Subscriber” in the screenshot.
You can even send notifications to all users of your WordPress installation by selecting “All users”.
Recipient supports multiple selections. To select multiple recipients hold down the control button (ctrl) on Windows or command button (cmd) on Mac.
Cc, Bcc
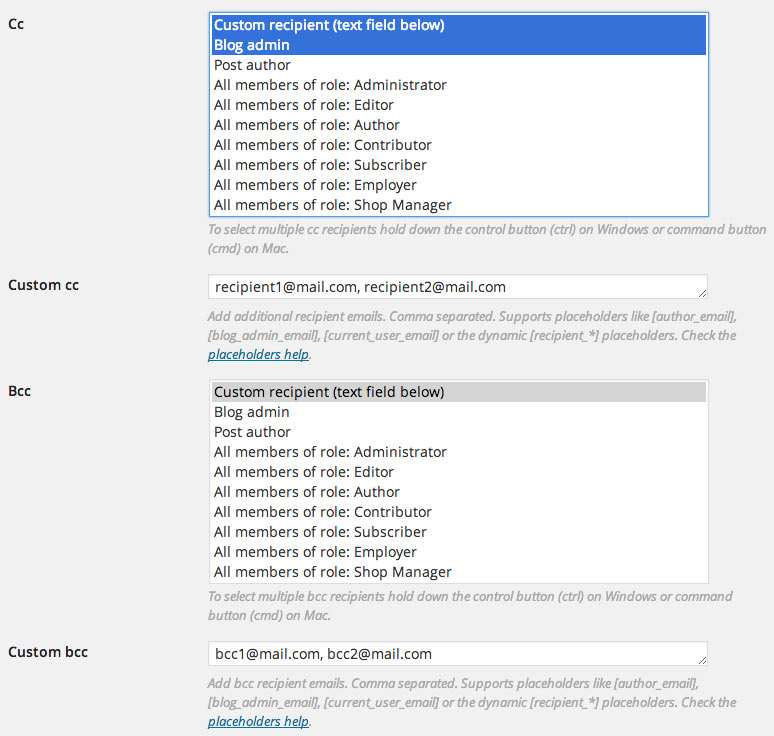
According to the same principle as selecting the recipient, you can choose multiple Cc and / or Bcc recipients. For custom Cc / Bcc addresses select “Custom recipient” in the according select box and insert the address in the text boxes below. Multiple addresses must be separated by comma.
Exclude recipients
Use this option if you want to exclude specific users from the list of recipients. Enter a comma separated list of WP user IDs or email addresses which should not be notified by this rule, e.g. “1, 2, author@mysite.com, 3, 4”.

Exclude current user
Use this option if you do not want the current user who saves / updates the post to receive a notification. PSN will match the current user’s email address with all recipients and remove it.

Editor restriction
If you select one or more roles in the select box “Editor restriction”, a notification will only be generated, if the editor of the post is a member of one of the selected roles. Leave blank for no editor restriction. To select multiple roles hold down the control button (ctrl) on Windows or command button (cmd) on Mac.

FROM
You can define a custom “From” address per rule. This will get used as sender.

Post whitelist
Here you can enter a comma separated list of post IDs to add to the whitelist. If one or more IDs are entered, this rule will ONLY trigger on those posts. Leave blank to let this rule work with all posts.

Post blacklist
Here you can enter a comma separated list of post IDs to add to the blacklist. If one or more IDs are entered, this rule will NOT trigger on those posts. Leave blank to let this rule work with all posts.

Options
Only active rules will be considered on status transitions. If you want to deactivate a rule, remove the check mark on the “Active” checkbox.
With the option Email you can determine, if this rule should send emails or not. This is handy, if you just want to log status transitions.

If you want to create log entries, set the check mark on Log. Log entries will be written when a rule matches and when emails got sent.
Save
When you have set all your options, click the button “Add rule”, to save the rule.

Rule administration
Edit, Copy, Delete
After saving a rule, it will appear in the rule table (tab “Rules”).
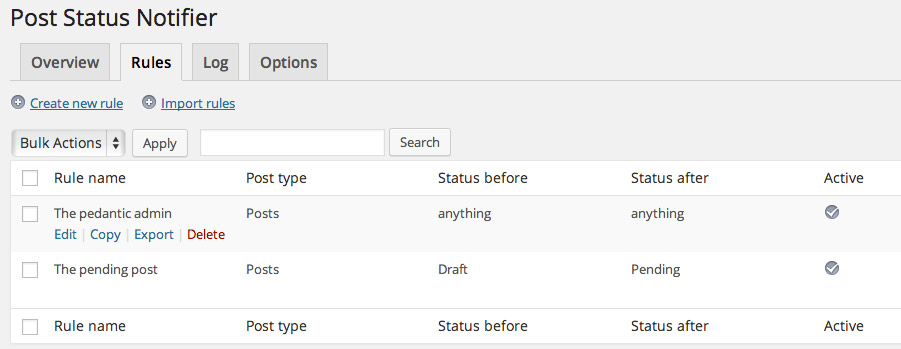
From here you can manage your rules. When your cursor hovers a table row, you will see the links “Edit”, “Copy”, “Export” and “Delete”. If you click “Edit” the rule will be loaded in the above explained form (see The form fields). Then you can change the rule settings and confirm by clicking the button “Update”.
If you click the “Copy” link, the rule will get duplicated. If you click the “Export” link, the rule will get exported to a XML file which can be used for import.
Bulk actions
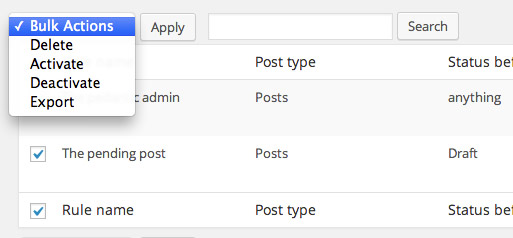
To edit multiple rules at the same time, you can mark the check boxes of the respective table rows and select an action of the Bulk Actions. Available actions are “Delete” (delete all marked rules), “Activate” and “Deactivate” (activate / deactivate the marked rules) and Export (exports all selected rules to a XML file).
Importing rules
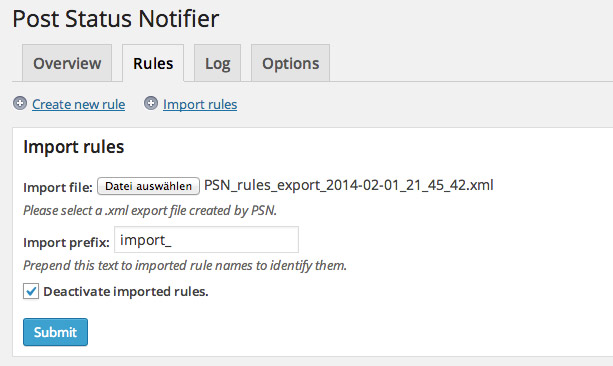
When you use the above mentioned ways to export rules, you can use the generated XML file to import those rules, e.g. on another WordPress installation. Click the link “Import rules”. The import form will appear. Select the XML export file of your choice as “Import file”. You may insert an “Import prefix”. This text will be prepended to the imported rules names. This way you can identify the imported rules if there are already rules with the same name. If you do not want the imported rules to be active after import, check the option “Deactivate imported rules”.
Debug rule
If you do not know how to setup a notification rule for your custom use case, it is always a good choice to have a debug rule. The only task of that debug rule is to capture the post status transition of your custom use case.
Note
You can download the debug rule export file on PSN’s resources page.
Setting up a debug rule is very easy. Set “Post type” to “all types” as you want to capture all changes and you maybe do not know the exact Post Type of your use case. “Status before” and “Status after” should be set to “anything” as you want to be aware of every status transition. At the end of the form do not check “Email”, just “Active” and “Log” as you do not want to receive emails for any change, you just want to analyse the log entries. The rest is optional.
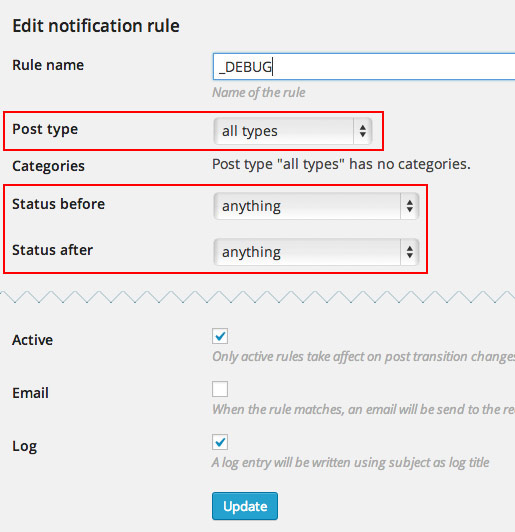
You can also click the button “Debug rule” in the right sidebar of the rule creation form which will set all options at once.

Finally be sure to check the option “Log rule matches” in PSN’s option page. This will create a special log entry containing all the information about the post status transition.

Now you can create a demo content of your use case and check the PSN logs:

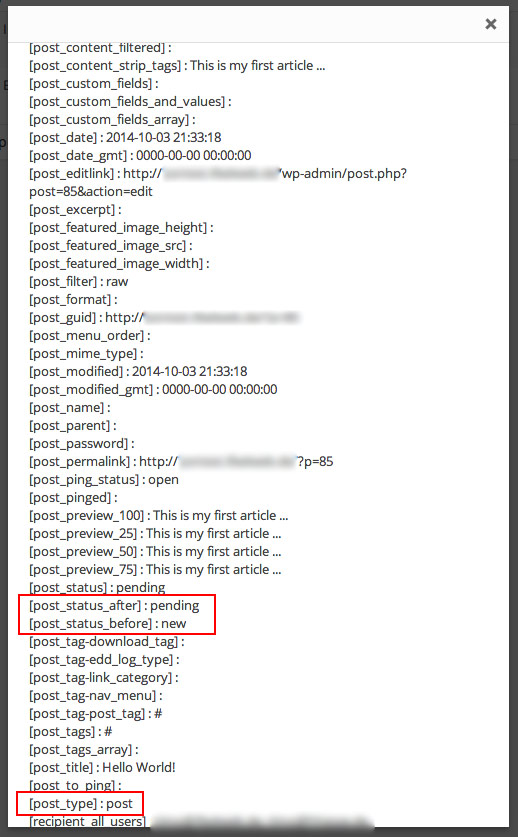
By clicking on the “Show details” link, you will see exactly what happened e.g. what was status before, status after and what placeholders were available. With that knowledge you now can setup a notificaton rule perfectly adjusted to your use case.
You can download the debug rule export file on PSN’s resources page.